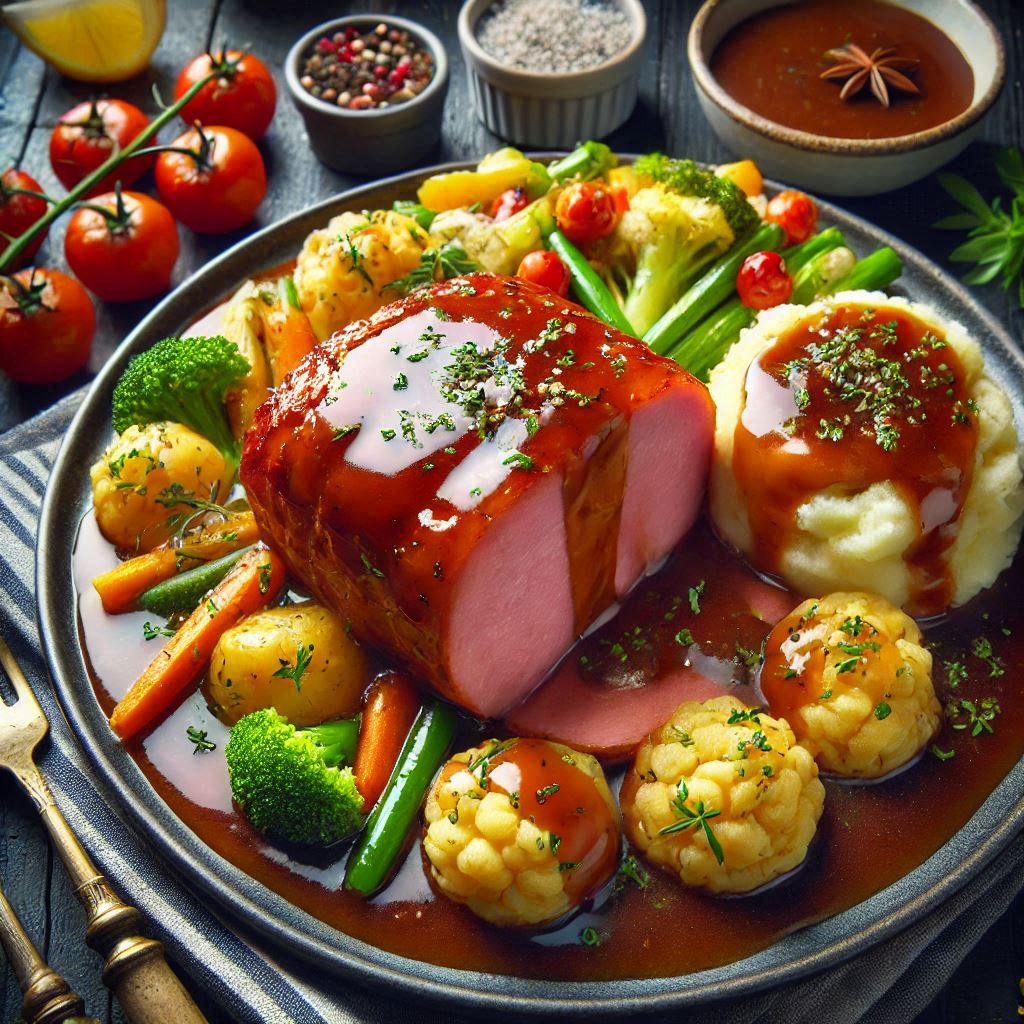
Ham Gravy Recipe
Ham gravy is a beloved staple in many households, celebrated for its rich flavor and versatility. Whether you’re serving it over fluffy mashed potatoes, warm biscuits, or even a slice of savory ham, this gravy elevates any dish it graces. In this blog, we’ll dive deep into the secrets of crafting the perfect ham gravy, including step-by-step instructions, tips for success, and creative variations.
Why Ham Gravy Is a Must-Have
Ham gravy is not just a side dish; it’s a comforting tradition. The savory essence of ham combined with a creamy texture makes it an irresistible addition to holiday feasts, Sunday dinners, or any occasion that calls for a touch of indulgence. The best part? It’s incredibly easy to make with just a few ingredients you likely already have in your kitchen.
Ingredients Needed for Ham Gravy
To create the perfect ham gravy, you’ll need:
- Ham drippings: The flavorful base for your gravy. Save these after cooking your ham.
- Flour: For thickening the gravy.
- Butter: Adds richness and helps create a smooth consistency.
- Milk or broth: To achieve the desired texture and depth of flavor.
- Salt and pepper: To enhance the taste.
- Optional seasonings: Garlic powder, onion powder, or a pinch of thyme can add a unique twist.
Steps to Make Ham Gravy
1. Collect the Drippings
After cooking your ham, carefully collect the drippings from the pan. If there are any large chunks of fat or burnt bits, strain the drippings through a fine mesh sieve.
2. Make a Roux
In a medium saucepan, melt 2 tablespoons of butter over medium heat. Add 2 tablespoons of flour and whisk continuously until the mixture turns golden brown. This step ensures your gravy will have a nutty flavor and smooth texture.
3. Add the Liquid
Gradually pour in 2 cups of milk or broth, whisking constantly to prevent lumps. You can use a combination of milk and ham drippings for a creamier, more flavorful gravy.
4. Season and Simmer
Add the strained ham drippings to the saucepan. Season with salt, pepper, and any optional seasonings. Let the gravy simmer for about 5-7 minutes, stirring occasionally, until it thickens to your desired consistency.
5. Serve Warm
Pour the gravy over your favorite dishes, and enjoy!
Tips for Perfect Ham Gravy
- Don’t Skip the Roux: A well-cooked roux is the foundation of smooth gravy. Take your time to whisk it properly.
- Adjust the Consistency: If your gravy is too thick, add a splash of milk or broth. If it’s too thin, simmer it a bit longer.
- Taste as You Go: The saltiness of your ham drippings will vary, so adjust the seasoning gradually.
Creative Variations of Ham Gravy
1. Creamy Ham Gravy
For an ultra-creamy version, use heavy cream instead of milk. This variation pairs wonderfully with biscuits or baked potatoes.
2. Spicy Ham Gravy
Add a pinch of cayenne pepper or a dash of hot sauce for a spicy kick. This version is great for those who love bold flavors.
3. Herb-Infused Ham Gravy
Stir in chopped fresh herbs like parsley, thyme, or rosemary for an aromatic twist. This variation adds a gourmet touch to your meal.
4. Mushroom Ham Gravy
Sauté sliced mushrooms in butter before making the roux. This hearty addition makes the gravy perfect for pouring over steak or roasted vegetables.
Pairing Ideas for Ham Gravy
Ham gravy is incredibly versatile and pairs well with:
- Mashed Potatoes: The ultimate comfort food duo.
- Biscuits: For a Southern-inspired meal.
- Vegetables: Drizzle over roasted carrots, green beans, or asparagus.
- Rice or Pasta: For a quick and satisfying dinner.
- Eggs: Pour over scrambled or fried eggs for a hearty breakfast.
Storing and Reheating Ham Gravy
Ham gravy can be stored in an airtight container in the refrigerator for up to 3 days. To reheat, warm it in a saucepan over low heat, stirring occasionally. If the gravy thickens too much, add a splash of milk or broth to loosen it up.
Conclusion
Ham gravy is a timeless recipe that adds a burst of flavor to any dish. With just a handful of ingredients and a few simple steps, you can create a gravy that’s rich, savory, and utterly satisfying. Whether you’re making it for a holiday feast or a casual family dinner, this recipe is sure to impress. Experiment with the variations and pairings to make it your own, and enjoy the comforting taste of homemade ham gravy.
Now that you’ve mastered this recipe, the possibilities are endless. Go ahead, grab your whisk, and transform those ham drippings into a gravy that will have everyone asking for seconds!
FAQs About Ham Gravy
Q: Can I make ham gravy without drippings?
A: Yes, you can use ham broth or bouillon cubes dissolved in water as a substitute for drippings. While it may not have the same depth of flavor, it’s still delicious.
Q: How can I make gluten-free ham gravy?
A: Substitute the all-purpose flour with a gluten-free flour blend or cornstarch. If using cornstarch, mix it with a small amount of cold water before adding it to the gravy.
Q: Can I freeze ham gravy?
A: Yes, ham gravy can be frozen in an airtight container for up to 3 months. Thaw it in the refrigerator overnight before reheating.
Q: What if my gravy is lumpy?
A: Use an immersion blender to smooth out the lumps. To prevent this issue, whisk constantly while adding the liquid.
Q: Can I make ham gravy ahead of time?
A: Absolutely! Prepare the gravy and store it in the refrigerator. Reheat it on the stove, adding a bit of milk or broth to restore the consistency.
Share this content:

A seasoned chef with over 10 years of experience in New York. I passionately share my journey and healthy, flavorful recipes online.


Post Comment